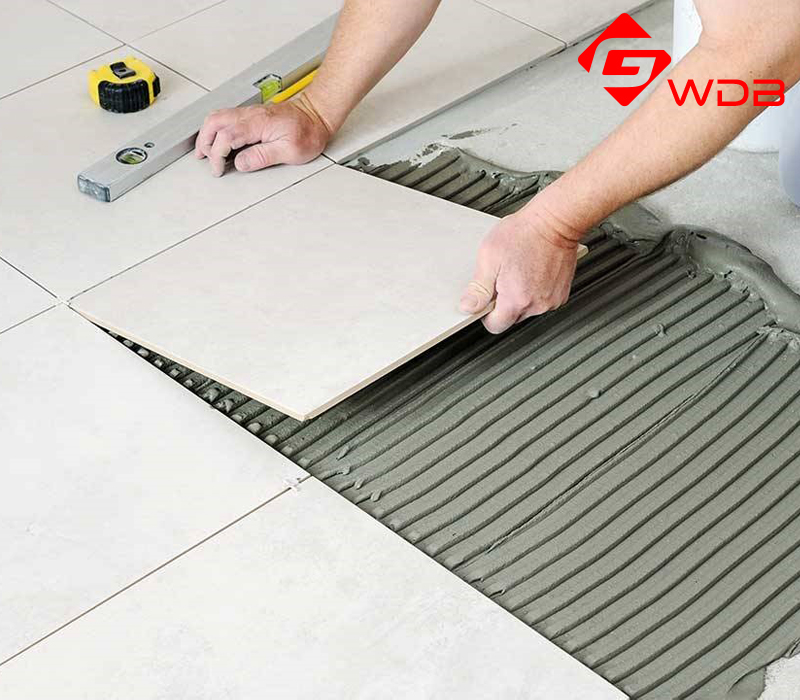
Instructions for applying floor tile adhesive
Tile adhesive is a product made from a mixture of cement, clean sand that has been screened on modern technological lines, polymers and some other additives. This is a flexible material so they do not peel or crack when the temperature changes. Therefore, they are used to prevent cracks, peeling, and breakage in bricks when paved with traditional cement.
With many outstanding advantages, we will guide the construction of tile adhesive in detail below as follows:
Step 1: Prepare the surface
Before applying adhesive to the surface, it is necessary to ensure the following criteria:
- All surfaces to be tiled must be flat (the difference should not be more than 10mm)
- Surfaces are clean, free from dirt
- Flat surface, removing any defects, old coating or impurities left on the surface
- The surface to be tiled must be dry: use a dry cloth to dry the surface to avoid moisture.
Step 2: Prepare floor tiles and tools
- When preparing floor tiles, it is important to note that the tiles must be dry, clean, not soaked in water.
- Need to prepare tools for mixing and construction such as tile adhesive, serrated trowel, tile cutter, traditional trowel, rubber hammer, mixer and other supporting tools.
Step 3: Mix the materials
- Put clean water in the prepared bucket.
- Slowly add floor tile adhesive to a bucket of water in the ratio: 2.5-3 parts glue to 1 part water by volume.
- Mix the above mixture with an electric mixer at slow speed or you can mix by hand until the mixture is homogeneous, without lumps.
- After mixing, wait about 10 minutes for the mixture to react chemically before mixing again.
- Do not add water or additives to the mixture once it has been mixed.
Step 4: Apply floor tiles
- Apply tile adhesive to the surface
- Choose a serrated trowel suitable for each type of brick to be constructed
- Spread a thin layer of glue just mixed about 3-4mm on the surface. For high adhesion, spread the glue evenly with a uniform thickness by using a trowel at a 45-degree angle to create grooves on the surface of the glue.
- Stick the tile on the glue surface
- Place the bricks on the glued surface, move back and forth to be perpendicular and make sure the glue is evenly spread on the back surface of the tile, adjust the brick to the correct position.
- Fixing bricks with support bars or supporting tools such as cross keel to get the circuit, levelling keel to flatten the brick, plastic wedge to flatten and fix the brick surface.
- Use a rubber hammer to lightly tap the surface of the tile so that the mangrove tile sticks more firmly and maximizes the use of the tile adhesive.
- Wipe the excess glue on the surface of the tile and grout, being careful not to move the tile.
- Wait about 24 hours to make sure the glue is completely dry for cleaning.
Note when using tile adhesive
- Do not apply tile adhesive in the back because this will create holes between the bricks and increase the risk of brick cracking and water infiltration later.
- The tile adhesive mixture should be used within the specified time after it has been mixed. Avoid applying adhesive on surfaces that are too hot or exposed to direct sunlight.
- Do not use tile adhesive on wood, plastic, asphalt, metal and glass surfaces
- Some notes to ensure safety and health
- Limit contact with skin
- Because the tile adhesive is an alkaline cement, it is likely to cause an allergic reaction to the skin. Therefore take measures to limit skin contact as much as possible.
- Do not let the glue get into your eyes, if accidentally splashed in your eyes, wash them thoroughly and then go to the nearest medical facility.
- Should wear gloves and use glasses when working
- Keep out of reach of CHILDREN
Where to buy floor tile adhesive?
In the construction market, floor tile adhesives are increasingly used because of their superior performance compared to traditional cement. There are many types of tile adhesives on the market, but WDB tile adhesive is still the most popular product. Contact us now to discover more WDB products for your project!


